
Spectre 上手指南
感谢你选择 Spectre 作为你的主题!下面带你完成初始化。你可以通过以下命令使用该主题创建一个新的 Astro 项目:
# npmnpm create astro@latest -- --template louisescher/spectre
# pnpmpnpm create astro@latest --template louisescher/spectre
# yarnyarn create astro --template louisescher/spectre
先简单介绍一下项目结构:
.|-- public/| `-- img/|-- src/| |-- assets/| | `-- pfp.png| `-- content/| |-- assets/| |-- other/| |-- posts/| |-- projects/| |-- info.json| |-- socials.json| |-- tags.json| `-- work.json|-- .env`-- astro.config.mjs仓库里当然还有其他文件和目录,但在本指南里它们并不相关,我们先忽略。
配置主题
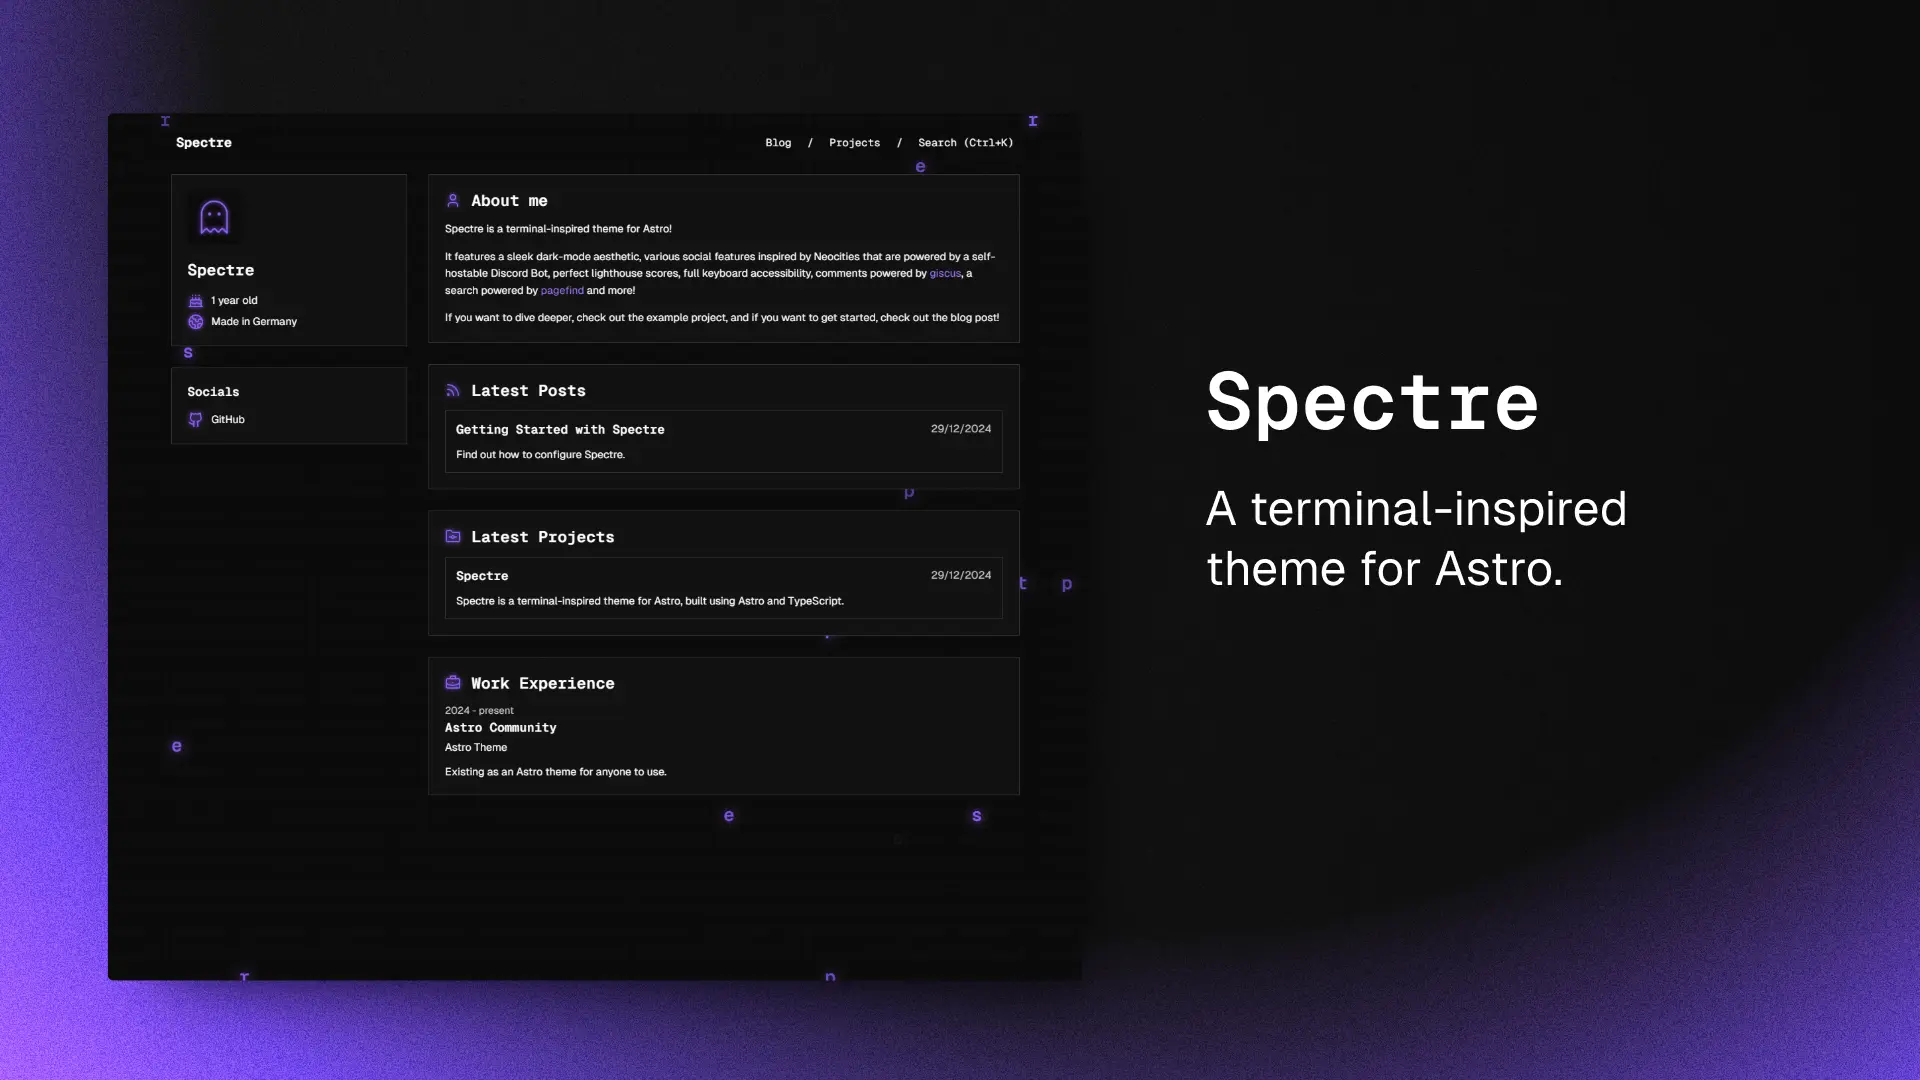
首先,进入 src/assets/ 目录,你会看到一个 pfp.png 文件。把它替换成你的头像即可。
接着打开 astro.config.mjs,把 site 参数改成你自己的网站地址:
import { defineConfig } from 'astro/config';
import expressiveCode from 'astro-expressive-code';import mdx from '@astrojs/mdx';import sitemap from '@astrojs/sitemap';import pagefind from 'astro-pagefind';import spectre from './package/integration';
// https://astro.build/configexport default defineConfig({  site: 'https://your-site.tld',  // ...});
然后你可以在 integration 的配置项里设置站点名称,以及各页面的标题与描述等信息:
export default defineConfig({  // ...  integrations: [    // ...    spectre({
      name: 'Spectre',
      openGraph: {        home: {          title: 'Spectre',          description: '一个极简的 Astro 主题。'        },        blog: {          title: '博客',          description: 'Spectre 的新闻与指南。'        },        projects: {          title: '项目'        }      }    })  ]});
你也可以在 integration 选项里把 themeColor 和 twitterHandle 放在 name 旁边作为可选配置。
主题色默认是 #8c5cf5。Twitter 用户名没有默认值,如果不提供,对应的 meta 标签会被省略。
评论
本主题使用 giscus 提供评论功能。如果你想启用它,先在 giscus 网站上完成仓库配置。随后在配置里加入 giscus 选项,并按 giscus 给你的脚本参数填入:
export default defineConfig({  // ...  integrations: [    // ...    spectre({      // ...
      giscus: {        repository: '...',        repositoryId: '...',        category: '...',        categoryId: '...',        mapping: '...',        strict: true | false,        reactionsEnabled: true | false,        emitMetadata: true | false,        lang: '...',      }    })  ]});
如果你想自定义 giscus 的颜色,可以修改 styles/giscus.css。修改后记得把主题地址配置为 https://your-site.tld/styles/giscus。
或者,你也可以把 giscus.theme 直接设置为 giscus 提供的某个内置主题。
编写内容
接下来进入 src/content/。你会看到一些 JSON 文件和一些目录。它们的区别是:JSON 文件用于展示一些不需要 MDX 能力的“快速信息”(比如简介、社交链接等);目录则存放真正的内容,比如博客文章与项目页。
你还会注意到有个 other/ 目录,目前只包含一个文件:about.mdx。它适合放一些需要 MDX、但又不属于其他分类的内容(比如关于页)。
下面逐个看看这些 JSON 文件都能放什么:
信息(Info)
info.json 用来存放主页上头像与名字下方展示的快速信息,会按照你在文件中书写的顺序显示。单个条目示例如下:
{ "id": 1, // ID,必须唯一(Astro 内容集合需要)。 "icon": { "type": "lucide", // 图标库:"lucide" 或 "simple-icons"。 "name": "cake" // 图标名称。 }, "text": "1 岁" // 要显示的文本。}Spectre 同时支持 Lucide 与 Simple Icons。
社交(Socials)
socials.json 的结构与 info.json 类似,用于主页第二张卡片中的社交链接列表。
{ "id": 1, // ID,必须唯一。 "icon": { "type": "lucide", // 图标库:"lucide" 或 "simple-icons"。 "name": "github" // 图标名称。 }, "text": "GitHub", // 链接显示文字 "link": "https://github.com/louisescher/spectre" // 链接目标地址}标签(Tags)
tags.json 保存你的博客文章可用的所有标签。想新增标签时,把它加到这里即可。
{ "id": "guide" // 标签的 ID/名称,必须唯一。}工作经历(Work)
最后一个 JSON 文件是 work.json,用于填写你的工作经历。下面的例子包含了所有字段,并且顺序正确;实际显示时会先展示 duration:
{ "id": 1, // ID,必须唯一。 "duration": "2024 - 至今", // 任职时间 "company": "Astro 社区", // 公司/组织 "title": "Astro 主题", // 职位/角色 "description": "作为一个任何人都能使用的 Astro 主题而存在。" // 简要说明}文章(Posts)
接下来是真正的内容:posts/ 目录存放你的所有博客文章(MDX 格式)。要创建一篇新文章,直接新建一个文件即可;文件名会作为页面的 slug。
每篇文章的 frontmatter 可以提供如下信息:
---title: "Spectre 上手指南" # 文章标题description: "了解如何配置 Spectre。" # 文章描述image: "../assets/spectre.png" # 用作 OG 图片的图片路径(相对路径)。createdAt: 12-29-2024 # 创建日期updatedAt: 12-30-2024 # 可选:用于 meta 标签,告知搜索引擎文章已更新draft: false # 可选:可用于完全隐藏文章tags: # 标签(引用 `tags.json` 中定义的标签) - guide---frontmatter 之后就可以开始写正文了(MDX)。如果你不熟悉 MDX,可以参考这份入门指南:MDX Getting Started。
图片建议放在
src/content/assets,这样可以与普通图片资源分开管理。
项目(Projects)
projects/ 目录和 posts/ 类似,不过用于项目内容。frontmatter 会有一些差异:
---title: Spectre # 项目标题date: 12-29-2024 # 发布日期description: Spectre 是一个终端风格的 Astro 主题,使用 Astro 与 TypeScript 构建。 # 项目描述image: ../assets/spectre.png # 用作 OG 图片的图片路径(相对路径)info: # 类 TOML 的信息列表 - text: GitHub # 显示文本 link: https://github.com/louisescher/spectre # 可选:链接到某处 icon: type: lucide # 图标库:"lucide" 或 "simple-icons" name: github # 图标名称---其他(Other)
src/content/other/ 用于存放不需要单独分类的 MDX 内容。例如这里的 about.mdx,就负责主页的“关于我”板块。
部署
Spectre 默认使用 node adapter。如果你要部署到 Netlify 或 Vercel,需要安装对应的 adapter:
如果要部署到 GitHub Pages,请确保把 astro.config.ts 中的 adapter 配置整体移除:
// ...export default defineConfig({ // ... adapter: node({ mode: 'standalone' })});之后可以按 Astro 的官方指南完成部署。
当你不使用 adapter 时,如果你提供自定义 giscus 主题,请确保在 src/pages/styles/giscus.ts 中设置 export const prerender = true;如果你并不需要自定义 giscus 主题,则可以直接删除该文件。
另外,你还需要更新 package.json 中的 postbuild 脚本:
{ "scripts": { "postbuild": "pagefind --site dist/client", "postbuild": "pagefind --site dist", },}修改主题
和所有主题一样,你可能会想做一些自定义。只要知道该去哪改就行!例如想修改主色,可以在 src/styles/globals.css 中调整:
| 变量 | 说明 | 默认值 |
|---|---|---|
--primary | 页面主色。 | #8c5cf5 |
--primary-rgb | 主色的 RGB 版本。 | 140, 92, 245 |
--primary-light | 用于链接。 | #a277ff |
--primary-lightest | 用于链接。 | #c2a8fd |
修改代码块配色
.md 与 .mdx 文件里的代码块由 Expressive Code 提供。默认情况下,Spectre 使用了 GitHub 深色主题的一种变体,并做了自定义背景色。
如果你想修改代码块的颜色(语法高亮、背景色等),可以在 astro.config.ts 里指定你想用的主题:
import { spectreDark } from './src/ec-theme';// ...export default defineConfig({ // ... integrations: [ expressiveCode({ themes: [spectreDark], themes: ['catppuccin-mocha'], }), // ... ], // ...});可用主题列表见 Expressive Code 官网:Themes。
← Back to blog